Showing posts with label healthy. Show all posts

7.31.2010

Plum vinaigrette (salad dressing)

plums poised and ready to make salad awesome

Super simple summer fare.  A handful of little red plums get jazzed up into this beautiful drizzler.

I used a dressing jar for easy measurements.  These you can find at Goodwill or Salvation Army for maybe 50 cents.  They were big in the 80's when those dressing packets were all the rage with moms who also seemed to be addicted to Crystal light.  Those dressings always had some lying name that sounded sweet and wholesome but was really just loaded with MSG.  Good Seasons or Good Seasonings... or Super Longlife-if-you-Buy-Our-Crap powder.  I dunno.  But the JAR is helpful.  On it there is a mark for Vinegar, Water (I never use that measurement for water but instead the herbs, spices, wine or fruit preserves measurement), and Oil.  You then can blend up to your heart's content without much going awry. 

If you don't have one.  That's okay.  A container that you can reliable close tight so that you can shake it vigorously is in order.  Like a mason jar or a little jam jar.


The measurements if you don't have the specialized jar are:

1 heaping tsp raw sugar or vegan sugar
1/2 tsp sea salt or 1-2 pinches
5 one inch plums or 3 two inch or so on... (this mix is for the sweet-tart blushy colored plums so you may not need sugar at all if they're very sweet)
1/2 Cup Apple Cider Vinegar (not Bragg's brand, others that contain the mother may be fine)
1/2 Cup Olive oil
1/2 tsp sea salt or 1-2 pinches
1/4 Cup of sweet sherry or a favorite red wine
1-2 TBSP plum preserves (this will make the vinaigrette a tad more instantly infused so you wont have to wait 1-3 weeks for the infusion)

Chop up plums and add those last to the mix and shake vigorously. Done, you're amazing.
This is delicious on cole slaw instead of whatever wet white stuff some folks like, and greens.  It doesn't end there, but I'm tired can you take over?

Coming to a mouth near you...

7.09.2010

Peach gaspacho

Before mixing together blended ingredients


I like to force on summer usually but this one has snuck up on me.  May wasn't cutting it, June just didn't feel right and then all of a sudden I was sweaty and irritated but berries started to appear. AAAAH There you are summer.  I was mad at you but I can forgive you for all the fruit you bring.  Until I'm sick of that too and then we will be on the outs again.

Gaspacho doesn't take much effort at all.  Best of all it doesn't take much cooking at all.  Recipes without the stove are a favorite.  This one requires light stove top activity.  When you use mango, peaches or any delicate fruit it is best to let it sit overnight and have the fruitiness infuse the entire soup.

This recipe yields approximately 5 cups.  It fed 4 people with veggie and fruit sides well.  It will feed 2 people like kings.

  • 3 ripe tomatoes
  • 3 ripe peaches (the sweeter, peachier the better)
  • 1 jalapeno
  • 1/2 Medium onion
  • handful of cilantro
  • salt to taste
  • sometimes I'll add some pepper seeds to up the heat
  • fresh zucchini slices on the side
  • avocado slices on the side
You can add garlic if you wish at any point (simmer it with the tomatoes if you want it a little more mellow) I did not this last time, and it was delicious without it too.


 Cut tomato in their middles the top and bottom facing out and the side on the cutting board and the knife slicing the other side which should be facing up.  By slicing it in half this way you can expel the seeds with one light squeeze.  I'm not too nutty about the seeds remaining, survivors will be eaten at no real cost.  But it is best to not have a very seedy gaspacho.  Roughly chop tomato pieces and put into a pot with a little olive oil enough to prevent sticking and cook just until the tomato has softened and turned bright red-orange.

Finely chop onion and jalapeno, rough cut cilantro and peaches.  These all go into the food processor until small bits remain (which is fine).   I pour everything into a container with a sprinkle of salt and put it in the fridge.

When you are getting ready to eat it just take it out of the fridge for an hour or two and serve it up with avocado slices and big fat salad. This soup travels really well for potlucks. Crostini is awesome with it. Toasted tortilla wedges too.

5.24.2010

Cherimoya


 If you're new to discovering this fruit then you're at least in my company.  To learn about the cherimoya for me is to gain the knowledge that if things turned castaway I would search the island praying it had these growing on it.  The fruit is not just delicious but also full of vital stuff as well: fat (none of it saturated), fiber, carbs, and protein.  It is one of those fruits that's a meal which can sustain you.

On it's flavor; it is a combination of tastes which can only be described as cherimoya.  It tastes like a pina colada if it were one fruit - banana, yogurt, vanilla custard wrapped in pineapple.  It is an experience for sure.  It can be blended with a tea, it can be turned into sorbet, eaten straight.  I would not recommend heating this fruit as it would lose a lot of the qualities it is coveted for.  It is a very impressive fruit which makes entertaining absolutely within everyone's grasp.  It is at it's best raw, cooled and/or straight up.  I do think it is a good raw dessert.  A nice filling for a pie crust.  A nice accompaniment to strawberries, blueberries and I'm sure others.  It's a king among the fruits for sure.  The wiki for Cherimoya.


I'm looking into some cherimoya ice cream!

Oat Flour Oil Pastry crust fresh from the oven

Cherimoya with yogurt cheese, ready to blend

For good pie crusts I recommend three kinds in order of favorite first:

1. An oil pastry.  Which is flaky, delicious and alright for those avoiding cholesterol or animal products.  My favorite being rolled oats blended in a food processor into a flour and using:
  • 1 heaping Cup of oat flour
  • 1 shallow cup of whole wheat pastry flour
  • 1/3 Cup -1/2 Cup olive oil
  • pinch of salt
Blend all in a bowl until well combined the oil makes the flour stick to itself and you can pat out 4 small tart shells or one large one.  Preheat oven to 450 bake 15 minutes checking to make sure not over browning.  Take out let cool and fill shell with blended Cherimoya.  I like to blend a little yogurt cheese into it to amp up the creaminess. Chill in the fridge for 15 -60 minutes and top with strawberries.

2. A blend of oats, whole wheat flour, butter and sugar like a "crisp." Or brown Betty.  Which is lightly toasted until crisp then fill with raw cherimoya or top the cherimoya after baking the crisp parts. 

3. A raw crust of hazelnuts or almonds ground and blended with just enough of either honey, maple syrup, or agave nectar to bind the nuts and pat into a pan and fill with spoon blended cherimoya and top with other fruits.


Cherimoya seeds have a very high germination success rate and seeds remain viable for a few years after cleaning, drying and packaging (jar or envelope).

4.07.2010

Dill Mashed Potato Soup with Roasted Baby Broccoli


First... What the hell is Baby Broccoli if it isn't actually young broccoli?  Or Broccolini for that matter?   Let us not worry too much and just look for organic and sexy food.

This soup is a great one to herald in spring while enjoying the remnants of winter.  For those concerned with cholesterol make up your potatoes with a bit of olive oil instead of butter.  It is decadent tasting and compliments most foods.  I was having a bad mashed potato craving when this struck me.  For cream soups I often use a little bit of mashed potato and roasted garlic to give soups the creamy without cream. ( Boiling any milk usually makes even the most cast iron of stomachs a bit upset - it is the break down of protein that does this to any belly.  Boiling and frying being the most severe ways to do this.)  So it was not really any great stretch for me to just make up a soup that was mostly mashed potato.  It really was just over due!

Broth: For the soupy part I made a vegetable stock out of my veggie scraps (sometimes this includes apple peels, cores and pear peels and cores - its amazing with this. Cores are best without the seeds) I used a lot of water and made sure it covered the vegetables as I wanted a light colored broth and a fair amount of it.  I boiled the vegetables just until they were tender.  More than that and you're over doing it really.  No need for it. The whole it will taste better thing is chemical.  It will taste better with more and more days of boiling.  It would be like finding carrion vegetable carcass you are built to like it when it is not necessarily good for you but great for survival. So be aware why that happens. Besides over boiling makes a broth you have to strain or RE-strain.  I try to avoiding picking out debris.

Mashed potatoes: I used russet potatoes as they were handy and cheap.  Yukon golds are also AMAZING for this.  I kept a little of their boiling water with the potatoes after they are cooked to help blend and mash them with either butter or olive oil (I do a little of each as I have very low cholesterol and a strong heart - weak ankles but I'm hoping that isn't related to butter). After salt, pepper, butter and/or olive oil is blended into the potatoes and fluffed I added a giant handful of dill I washed and pulled all the frilly fronds from the stalks and piled them on top of the potatoes and let them wilt and folded them in.  Fresh dill is quite light in flavor and I have a hard time overdoing fresh herbs. I like a lot of them in there.

Baby Broccoli: For the baby broccoli I drizzle (really you don't need much) it with olive oil then lightly salt it, and for my tastes I sprinkle it with jalapeno seeds.  The oven is heated to 450 and once hot, the broccoli wont take long to get bright green with a couple of darkened patches.  I use the higher heat to keep the broccoli firm and crisp with a few roasty parts.  You can manipulate it if your OCD makes you.  Mine did... So I jossled it and put it back in.  Total cooking time plus OCD was not more than 20-25 minutes.  Just keep a close eye on it.


To serve pour a small amount of broth in a bowl make a nice little mountain of potato in the center and lay a mountain of broccoli over the peak.  Munch well!   I think an Asparagus version of this is in order.

4.05.2010

Veggie bake


What? They can't all be fancy.  I want to just tell you grab a favorite fruit and a favorite lettuce and combine them - but either you will or you won't.  What I don't have to tell you is that salt, pepper and olive oil make simple things delicious.

This meal is a chopped bed of cabbage, a layer of thinly-sliced carrots, red peppers and 1/2 chopped jalapeno, and then some zucchini slices piled on with sprinkles of sea salt, smoked salt, cracked pepper, and olive oil drizzled over the top.

For the topping I shredded {thin shreds} of cheddar and cubed one slice of bread - that is it.  I put the cheese on first so it wilts and I like the bread on last to be extra crunchy.

 I baked these for about 35 minutes at 375 - 400 degrees. Then in the last minute added a shred of cheese and a thin slice of my favorite European styled sourdough from, gasp, a package {French Meadow -- it is vegan and not adulterated with the bad stuff} (how Rachel Ray of me - It isn't the grossest I've been, but it is close). This is put in only long enough for the tiny cubes of sourdough to crust up.  This casserole is then served over the top of whole wheat pasta with as much fresh basil as you can handle.  I don't bake the pasta in the casserole as in order to get the timing of the veggies done and the pasta done without the over baking is tough and as stated before I am not a patient woman.  I like easy. So everything but the pasta went into a casserole dish to bake.  I put cabbage on the bottom because it wont stick to the dish and doesn't need oil to do it, its magic.

3/4 Cup shredded cabbage
1 big carrot
1 red pepper
1 small zucchini
1/2 jalapeno (more if you wish)
drizzle of olive oil (it wont need much at all!)
salt and pepper
sliver of cheese shredded after it is nearly ready to come out
slice of day old bread for croutons -best on top

Fresh Basil or cilantro
However much pasta you need to feed your tribe.  I used Organic Whole Wheat.

My casserole dish will fit about 5 cups of goods in it before it is maxed out.  So up the numbers if you need.  This is a quick throw together.  Clean out your refrigerator into this tasty dish.

You can serve this without cheese and bread slice and instead serve it over a tortilla, or with cornbread, or with rice or shepard's pie style... yum.  No matter your choice, this is an excellent wine drinking meal.

4.02.2010

Carrot Juice


Sometimes it is hard getting variety.  Even as an adult it becomes hard to eat your veggies.  When I was a vegetarian (mostly because shamed to say "meat" always made me have terrible poos when in reality it was the additives and processing not the actual thing -- anyhow...) I managed to not eat a lot of fresh or raw vegetables.  Doughnut vegetarians, I was one.  I do and did have a love affair with raw fruit and veggies.  NOTHING makes me happier than pear slices over a bed of arugula sprinkled lightly with sea salt, and still I'll contently eat rice and pasta and bread the week away until I start to look like pasta.

So I got a juicer some time ago.  I did all my research and found some amazing ones.  They all had amazing price tags.  I got the Waring Pro for 49 dollars ... instead. The reviews were very high and the price was not. Now I cannot sing its praises as the reviewers do.  It leaks a little from the spout after the juicing is done, it gets full of the debris quickly and the remains of veggies and fruits are still wet to the touch - that is precious juice I could be drinking!  So what this means is the leftovers are soft and flavorful enough to be fed to voracious little chickens (NOT SOLELY.  But as a supplemental treat). Where the more expensive models, the one in particular I did not get because it is 350 dollars leaves the remains dry and sapped. Which is good for you, and the debris is good for compost but not feeding.  The chickens will stare blankly at what you are trying to do to them.

The downer with this (waring pro) juicer is you see all the stuff that COULD be used. All that stuff that gets tossed, wet and sad into the compost or chicken bucket.

So I do enjoy some tasty juices and then afterwards have guilt at what seems like waste.  For now anyway.  I will do a post on the compost and tell all if that becomes successful.  But in the interim I think it is important for everyone to take some time out for themselves and treat yourself occasionally to some juice.

My favorite juice is Carrot.  For people who feel they don't like carrots this is something that usually wins them over.  Folks think that it will be bland or woody or something of a vegetable nightmare.  I think the light earthy flavor is divine, and that carrot juice goes down like chocolate milk goes down in a kid. Second in line would be Carrot, Apple and Ginger (fresh of course) and you can get a large ginger root and keep it in a container garden even in apartments and use pieces from it.  I love using Apples that you otherwise wouldn't enjoy eating.  You get a big bag of apples and you wash it, love it and then take a bite and dear God, it is THAT texture.  That mealy terrible texture that makes you rethink whether you actually ever liked apples at all.  YOU DO, you still do.  These are great for juicing. They are failures at being good on salads and even sometimes baked... but succeed as being juice.


Carrot juice:
5-8 carrots for one person (approx. you can do more... I do often.)

Carrot, Apple, Ginger:
5-8 carrots
1-2 apples (you can substitute pears, if the price is right or you have a tree etc.)
1/2 inch chunk of ginger
This will make JUST enough to share... or not. 

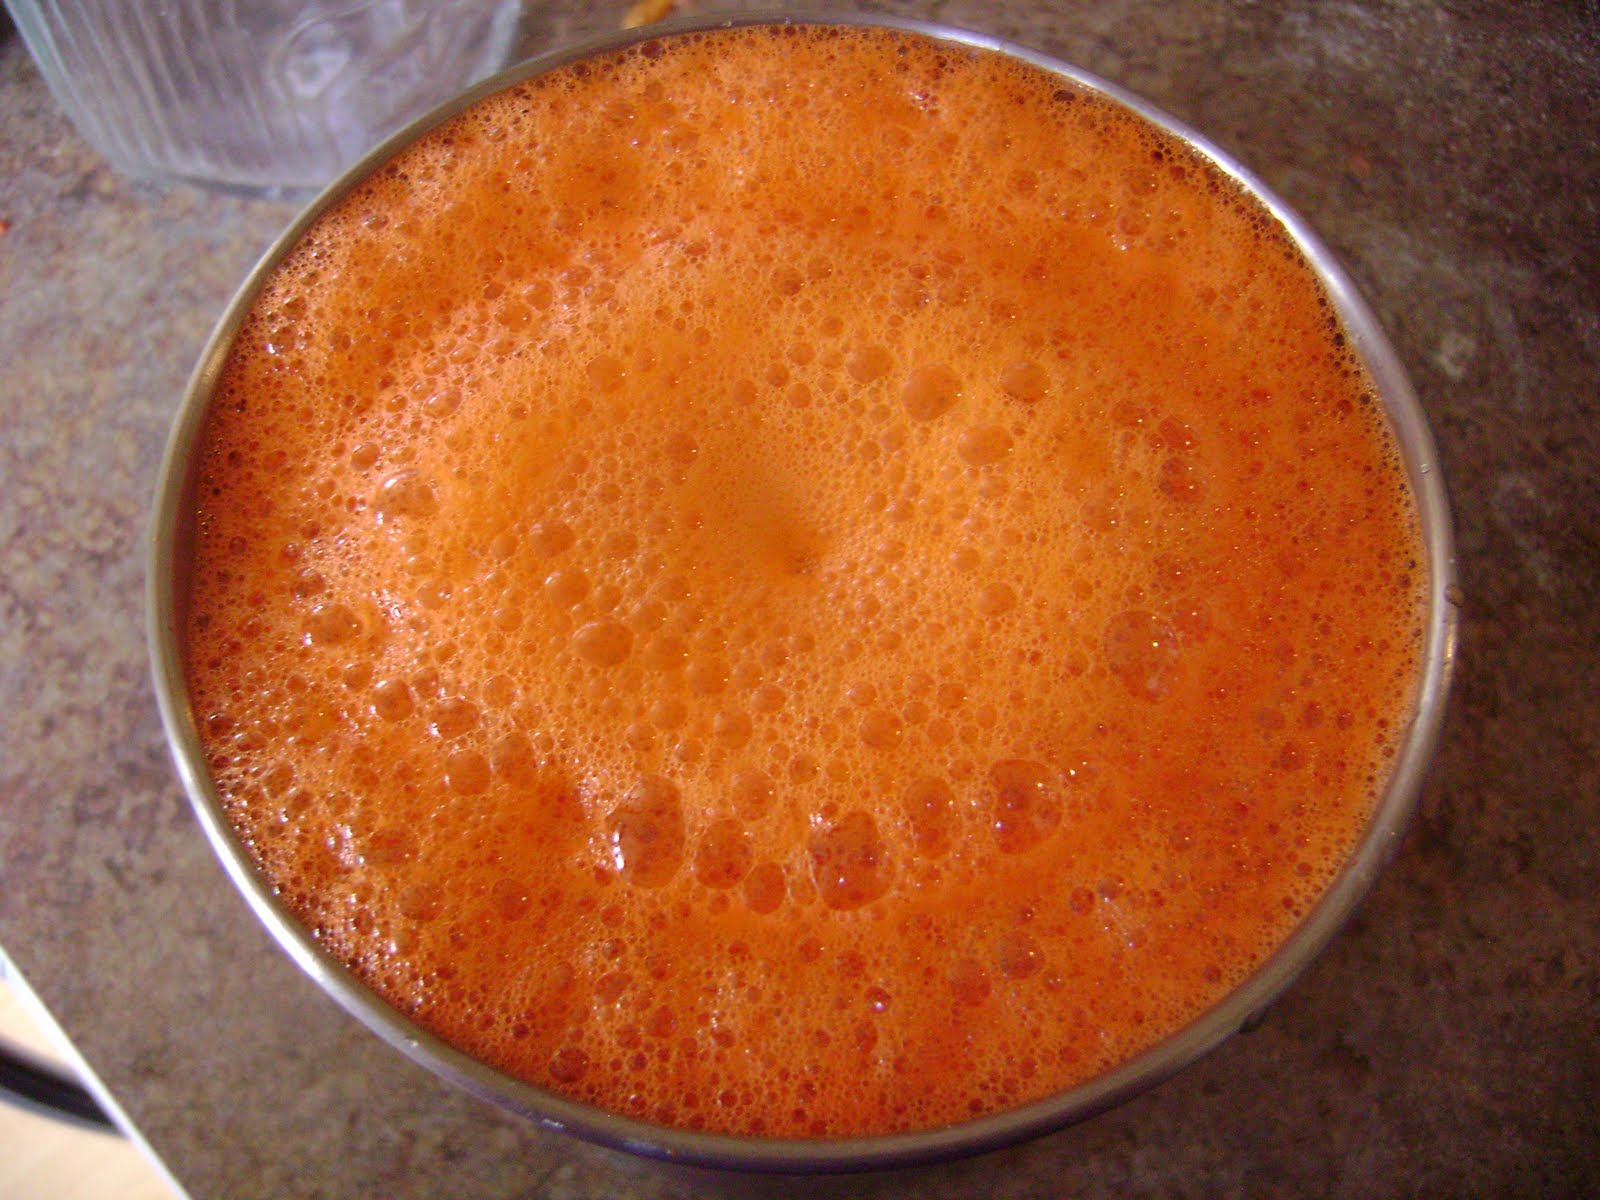
The sooner you drink it, the better.  Straight from the juicer it will be frothy and wonderful.  You CAN juice more ahead of time and refrigerate the rest for drinking for the next few days.  I would strongly recommend drinking it within the week it is made.  Fresh is fresh and not, well... isn't.

3.19.2010

Cabbage wraps

Just noticed the name on the pan- not the best name they could have come up with.

Oh man,  you know what's tasty?  Feta.
So I have this thing for foods wrapped in vegetables... MEALS wrapped in vegetables even.  Lettuces instead of tortillas or cabbage instead of pita or???  You get the idea.  These can be made vegan by using extra apple and leaving out the cheese and serving with a salad instead of cornbread.

These are made with:
  • Cabbage leaves whole
  • 1 (cup after cooking) basmati rice
  • 1 small potato cubed
  • 1 small onion minced
  • 1 small red pepper minced
  • 1/2 cup ground meat or 1 cup mushrooms either - or
  • 6-10 basil leaves cut chiffonade
  • pinch salt and pepper
  • 1 TBSP olive oil
  • feta
  • granny smith apple
For these little guys I wash my rice with a hot water rinse several times until the water is clear and not milky.  Cook rice and set aside with lid on.  In a skillet put minced peppers and minced onions into 1 TBSP  olive oil and cook until cellophane/translucent and meat (I used ground turkey) and brown. If you are making this with mushrooms I recommend cooking those separately and reserving the mushroom juice for either a gravy or veggie stock. Once everything is cooked set aside. Cook cubed potato until soft, then drain.

In a bowl combine 2 parts rice to your 1 potato and mush with a fork to break up the potato and work into the rice.  Then add pepper, and salt. Stir in your meat or mushroom and basil ribbons.

Now take the biggest leaves of cabbage and separate them from the head rinse them and be careful not to rip them.  Use a large pot and fill with just enough water that you can dip your cabbage leaves. Once the water is hot use tongs and dunk your leaves a couple at a time until just supple enough - not completely flimsy. Set these aside on a plate or clean surface, repeat until through all your leaves you wish to fill.

Then lay out your leaves.  Shake out the leaves to rid of water. With the curl in the leaf facing you looking like a bowl and the hard end closest to you. On the hard end put a slice of apple, a slice of feta, and a fat spoonful of prepared rice on top roll using your hands to tuck filling and slowly the leaf sides in continue to roll until the curled end cups the wrapped filling completely.  Lay your completed bounty on a lightly oiled baking sheet.

    Pepper cornbread is made with:
    • 2/3 C Fine ground corn flour
    • 2/3 C Stone ground corn flour
    • 2/3 C lightly coarse corn flour
    • 1/2 tsp baking soda
    • 1/2 C sugar
    • 1 pinch salt
    • 1/2 C butter
    • 2 eggs
    • 1/2 - 2/3 C half and half ( don't worry about fat... share it! )*
    • 1 small red pepper minced
    • 1 jalapeno minced
    For cornbread preheat oven to 375.  Butter a casserole dish, sides as well.  Put flours, salt, and baking soda together and finger sift together.  Once butter is softened a bit pour sugar into it and beat until fluffy and well blended then add eggs and beat until mixed, it is alright if it looks a little lumpy.  Pour flour mix into butter mix and blend with half of your cream and fold in the peppers then if dry add the other half. * Now you CAN cut back the cream if you wish but I would NOT recommend another milk.  And worse if it is a milk replacement like soy or rice (watch out for NATURAL FLAVOR).  {coconut milk or water being the best replacement for milk in this recipe} The less fat a milk has the MORE it will break down in cooking and that is the broken protein which is addicting.  You can get wild and try water.  It will be different, but with enough salt and sugar no one will miss it too much.  This cornbread should be done at 20 minutes give it a poke test to see.  If the center is jiggly it will need about 10 minutes more.  If the center comes out a little soft like sticking to a utensil then it will need 5 minutes. As ever... always eat this when it looks best to you!

    After bread is about to come out put your tray of cabbage wraps into the oven for not much more than 5-7 minutes. Just long enough to melt the feta a bit and give a nice warmth over all. Serve up!  You can garnish wish a sauce or honey.  


      3.16.2010

      Borscht


       This is a squash and tomato borscht.  Easy to make nearly no fat at all (croutons, cheese, olive oil would add fat).  It can be vegan, just leave out egg slices and no cheese.  It can be served cold on a wicked hot day or warm to make a chill go away.

      This recipe is for 3 hearty servings, double for more or leftovers.

      Soup Base:
      2 cups pureed tomatoes
      1/2 cup water
      1/2 onion
      1/4 jalapeno with seeds included
      2 minced garlic cloves
      1/2 potato cut into little cubes
      1 TBSP olive oil
      pinch oregano
      pinch salt
      pinch basil (dry) or add fresh basil leaves in the last minutes before serving
      1 small zucchini
      1 small yellow squash

      *1/3 or more concentrated vegetable stock from your own recipe! (below)


      If you are having croutons you'll want to preheat the oven after everything is chopped and the soup is going. After the stock is finished and I'm about to add it to the soup then I bake the croutons at 350 for about 5 minutes on each side with the pan lightly olive oiled and making sure each slice is rubbed in the oil.  Once the croutons are browned and crisp they are done.

      For the soup base put all your ingredients into a pot except the squash and zucchini and simmer until potatoes are semi-soft - now is when you add your squash and zucchini then the vegetable stock last and stir together and leave to simmer once potatoes are soft it is done. If your soup seems too thick for you then add a little water... taste and if you wish to extend it further add a little more.

      Veggie stock can include a lot of things and is not limited to this list but is what I used for the one tonight.

      *stock:
      handful rainbow chard stems cut down (you can use the soft leaves in another meal)
      handful parsley stems
      handful cilantro stems
      1/4 purple onion (doesn't need to be purple, whatever is on hand is fine)
      handful carrot butts (the orange end before the greens can be used in the stock but the greens tend to not add so much flavor as the hard little stem parts)
      1 handful mixed stems from zucchini and squash

      To make the stock you add 1-2 cups water to cover some of the vegetables and boil until the broth becomes yellow-amber.  The darker the color the richer the stock. Strain the broth off and toss the stems and butts into the compost. You wont need much broth to add a lot of flavor to a soup. So don't worry if you haven't much after the boil and straining. Also boil just until veggies are starting to get soft, you don't want them to break down to the point of mush that creates the bad stuff.  I like to add my stock to the meal when it is nearly done as it wont need to cook again.  If it is frozen then leave it out to thaw it rather than simmering it down if you can.


      I made some hard boiled eggs to serve along with the soup and a sprinkle of parsley and some grated cheddar.  I only regret not eating it with more parsley!  So tasty.

      3.13.2010

      Cranberry Apple Muffins (vegan with simple substitutions)


      The base of this muffin can be used for several kinds of muffins just changing the fruit you put in it (Or chocolate and nuts instead of the healthier stuff).  Pumpkin and chocolate chip is a favorite non-fruit muffin.


      1 1/2 Cup whole wheat (you can double the wheat in this and not change any of the spicing and get the base for other muffins, Pumpkin I just add more spices and leave it at 1 1/2c ww)
      1tsp baking soda
      1 pinch salt
      1 heaping TBSP cinnamon
      1/4 tsp nutmeg
      1 Cup cranberries
      1 granny smith peeled and chopped (I sometimes make just cranberry muffins if an apple isn't handy - I'll just make the 1 Cup cranberries a little more heaping!)

      3 eggs (you can use applesauce instead or use 1/4 Cup applesauce to replace each egg you remove if you use applesauce you have to decrease the oil by a 1/4 cup - so 3/4 Cup applesauce and 1/4 Cup oil - if replacing all the eggs.)
      3/4 Cup - 1 Cup vegan sugar or 1/2 Cup brown sugar plus 1/4 Cup other kind of sugar anything lighter in taste if using brown.  (you can use all light brown and it gives a richer earthier sweet, I do not tightly pack the brown sugar when measuring)  You can easily reduce the sugar by also using less cranberries as they can be REALLY tart.
      1/2 Cup olive oil you can add more should your batter be dry, but I like to start out with less.


      Preheat oven to 350. Okay, so dry stuff (not sugar) in a bowl, wet stuff and sugar in the other bowl.  Beat together wet stuff plus sugar. Pour cranberries into dry bowl... coat.  Pour apple chunks into dry bowl... coat.  Then rubber spatula the wet stuff into it and mix vigorously until all flour is blended into the wet and use a 1/4 cup measuring cup and scoop batter into the muffin tins.  I use unbleached paper liners to keep the muffins super portable and to avoid cleaning anything. Bake for 20-25 minutes.  I almost always use 22 minutes, maybe your stove is more awesome so always check them!  If you've used a good amount of sugar your muffin tops will be stiff and DELICIOUS! I also leave them on the counter uncovered so the tops stay firm and lovely. They are always eaten within the first night or the next morning anyway. 

      3.12.2010

      Pasta

      This pasta is so easy to do you can even have kids make their own portions if you have space and the patience for messy little ones.

      The approximate proportions are for every 3/4-1 Cup flour an egg, a teaspoon of water, a teaspoon of salt and a TBSP of olive oil be used. From there you can make a great variety of kinds. You can leave out the oil and use more egg or you can leave out oil and use more water. Or in the water's place some puree spinach or herbs instead.


      For about 4-6 servings is the recipe that follows:
      1 slightly heaping cup unbleached flour
      1 slightly heaping cup whole wheat
      2 tsp salt
      2 extra large eggs or 3 large eggs
      2 TBSP olive oil

      I chopped up a sprig of rosemary and put a little palm full into the 'pasta well.'


      Pour the flour onto a large clean surface leaving it in a heap, push the measuring cup or your hand into it to make a little well to hold the other ingredients. Into the well put your eggs, salt, oil, any herbs or veggie mash/puree and blend the eggs and others in the center and push some of the flour into the center collecting as much flour as it will carry. Clean off your fork into your pile and toss him somewhere out of the way. Get your hands in there and work the dough from this ugly stage into a ball. DO NOT WORRY if it looks like a massive failure. Pasta does that, its a dirty trick it tries to play on you in a last ditch effort to not be eaten. It will comply with the palm of your hand. If you run out of flour and it wants more then add a little... if it is not blending and it is too dry then add a teaspoon of water until it gives up the goods and becomes blended.


      Now that you have won and the ball is formed put it into either a covered bowl to rest or a plastic bag. Have it rest for 10-20 minutes until it goes from dry and leathery to lightly sticky and pliable. If not, give it a little more time. Clean up the chunky flour, sieve it and toss the chunks. Re-flour your big clean surface and press your ball out by hand into the floured surface allowing it to collect flour on both of its sides... form the ball into a rectangle to help you roll it out. Make certain flour is under it and roll, roll, roll, until it becomes smooth and thin. This is the most time consuming part. Once rolled out to be quite thin 1/16th of an inch? I don't know, I'm not an architect. Thin, but not totally translucent or anything. Flour the top which you were rolling on, flip and flour that side wipe off excess. Starting at one of the short sides roll it like a tube onto itself lightly.


       Once you have your tube cut little slices all the way through to make pasta strands. They'll look like little snails and now they can be put somewhere to dry or can be cooked straight away. I like to dry them for awhile or overnight so they are toothy and firmer. So if you like al dente then drying is for you.  Fresh pasta does cook faster than boxed pasta so monitor it closely.  It cooks in almost half the time.


      I made a spinach pasta and was so excited that I didn't document much. So I promise to post that SOON!

      Cast Iron skillet Pizza

      Pear and goat cheese pizza

      CRUST:

      1/2 package dry yeast
      1/3 cup warm or room temperature water
      3/4 cup unbleached or whole wheat flour (you can mix and experiment with this)
      3/8 tsp salt
      3/4 tsp sugar or 1 tsp honey (honey is a great addition for aiding in rising breads)

      This will make a 10-12 inch pizza. I often do a couple of bowls up with this recipe in it so each skillet can have a different kind of pizza in it. Does anyone ever agree on pizza toppings?

      Mix yeast into warm water let sit for about 10 minutes. I preheat my oven to a warming temperature to create a warm environment for the dough. Mix salt and flour together and add sugar. Make sure it is thoroughly mixed salt kills yeast so you don't want direct contact. Then pour in water and blend with a spoon. Once mixed place in a warm spot and cover with either a warm damp towel or a clean towel. Let rise for at least 45 minutes. 2 hours is best but who has the time and it isn't all that different in the last hour. Oil the cast iron skillets - (the amount of oil/time you use will determine how crisp your crust is.  I cover it with a veil of oil and will check on it after 25 minutes to make sure it is crusting up.)

      Then turn out dough onto a liberally floured surface knead in the flour and try to keep your dough approximately the shape of your pan. If the dough is a little firm and lost a lot of flexibility let it rest there for a few minutes (10). Make sure the surface is lightly floured for the roll out and use a pin to gently roll out your dough to the size of your pans bottom and or the sides as well. This dough wont be stiff enough to stay along the side of the pan but if you leave it a little thick it will make a "handle" crust.


      Cover in your sauce, top with choice of toppings bake at 425 for about 20-30 minutes depending on your oven and your taste preferences.

      Jalapeno cheddar pizza

      3.11.2010

      Dried pepper sauce

      I cannot get enough of dried peppers. Only smoked peppers beats dried, and they can be used in a plethora of ways.  Baked them into a bread or corn muffin to make soup companion.  Saute them into a sauce to make your marinara clear your sinuses.

      Now depending on the kind of hot you are trying to acheive (I'm a firm believer that hots can be very complex) is how you treat the peppers and what kind of peppers you use.  I am horrible at organizing anything and labeling anything... so I often find myself discovering flavors as I go along.  For this sauce shown I heat up oil to enliven the heat of the peppers.

      The basics:
      1-4 tsp dried peppers
      1/4 purple onion (minced)
      2-4 garlic cloves (slivered)
      1 pinch oregano Yes, that is a measurement I use, and hell that's the metric for it too.
      You can add rosemary, I just forgot to.
      1/4 tsp salt or to taste
      drizzle - 1/4 c apple cider vinegar depending on your taste
      drizzle olive oil for garlic slivers
      and drizzle to taste after mixing everything else

      I put the peppers into a little bowl, heat up a drizzle of olive oil. Cut the garlic and at med-high heat put slivers into the oil brown garlic for just a second, and once dark edges appear pour the whole thing onto the peppers... while the dry peppers soak up the hot oil I sprinkle a pinch of salt over it.  I take the purple onion and mince it, put into the bowl and pour in the vinegar a pinch of oregano and a little more oil.  Stir it up.  You can put this into a container or jar.  In the refrigerator the shelf life is pretty long and in the cupboard I would not leave it for more than a month before using entirely.

      This sauce can be tossed into a pile of pasta, smeared onto a sandwich, put onto little crostini with a slice of cheese or blended with stale bread chunks to heat up your croutons (I'd add more oil for the latter).

      Berry dressing


      Dear God, do I love berries.  Nothing is more amazing than a berry vinagrette drizzled over soft buttery leaves!  Want to power pack that chicken or turkey sandwich?!  Put a berry dressing on it!

      Yes, that was a lot of exclamations.  I mean it.  I can't get enough of them.  You can alter any of these basics to yield the most sumptuous sauce and add your own complexities as well.

      I used frozen blueberries, but of course you can use fresh.
      Blueberry dressing:
      1 c blueberries
      3 tsp sugar
      1/4 c apple cider vinegar
      a tiny sprinkle of salt

      Pour berries into a pan and simmer them until they leak some of their juices as they look and smell warm add sugar and salt, mash loosely with a fork and let cool... while still warm add vinegar to the berries.  Pour this into a container and let sit in the fridge for at least 3 days.  The wait is hard, but the berries become more infused through the vinegar.  You can always add things to this to get other tones.  Sprig of mint during the heating stage, a dash of cinnamon... its a good base for going nuts.

      I like this on spinach and butter lettuce.  I had it on a turkey sandwich and I made a pasta salad with spinach and turkey with it.  It's a delight and helps me get through the end of the winter.

      Blueberry dressing